Tripo AI is a company focused on generative AI 3D modeling. It provides user-friendly platforms and API services that can quickly convert text prompts or 2D images (single or multiple) into high-quality 3D models. ComfyUI has now natively integrated the corresponding Tripo API, allowing you to conveniently use the related nodes in ComfyUI for model generation. Currently, ComfyUI’s Partner nodes support the following Tripo model generation capabilities:Documentation Index
Fetch the complete documentation index at: https://dripart-mintlify-e28287af.mintlify.app/llms.txt
Use this file to discover all available pages before exploring further.
- Text-to-model
- Image-to-model
- Multi-view model generation
- Rig model
- Retarget rigged model
Text-to-Model Workflow
1. Workflow File Download
Download the file below and drag it into ComfyUI to load the corresponding workflow.Download Json Format Workflow File
2. Complete the Workflow Execution Step by Step
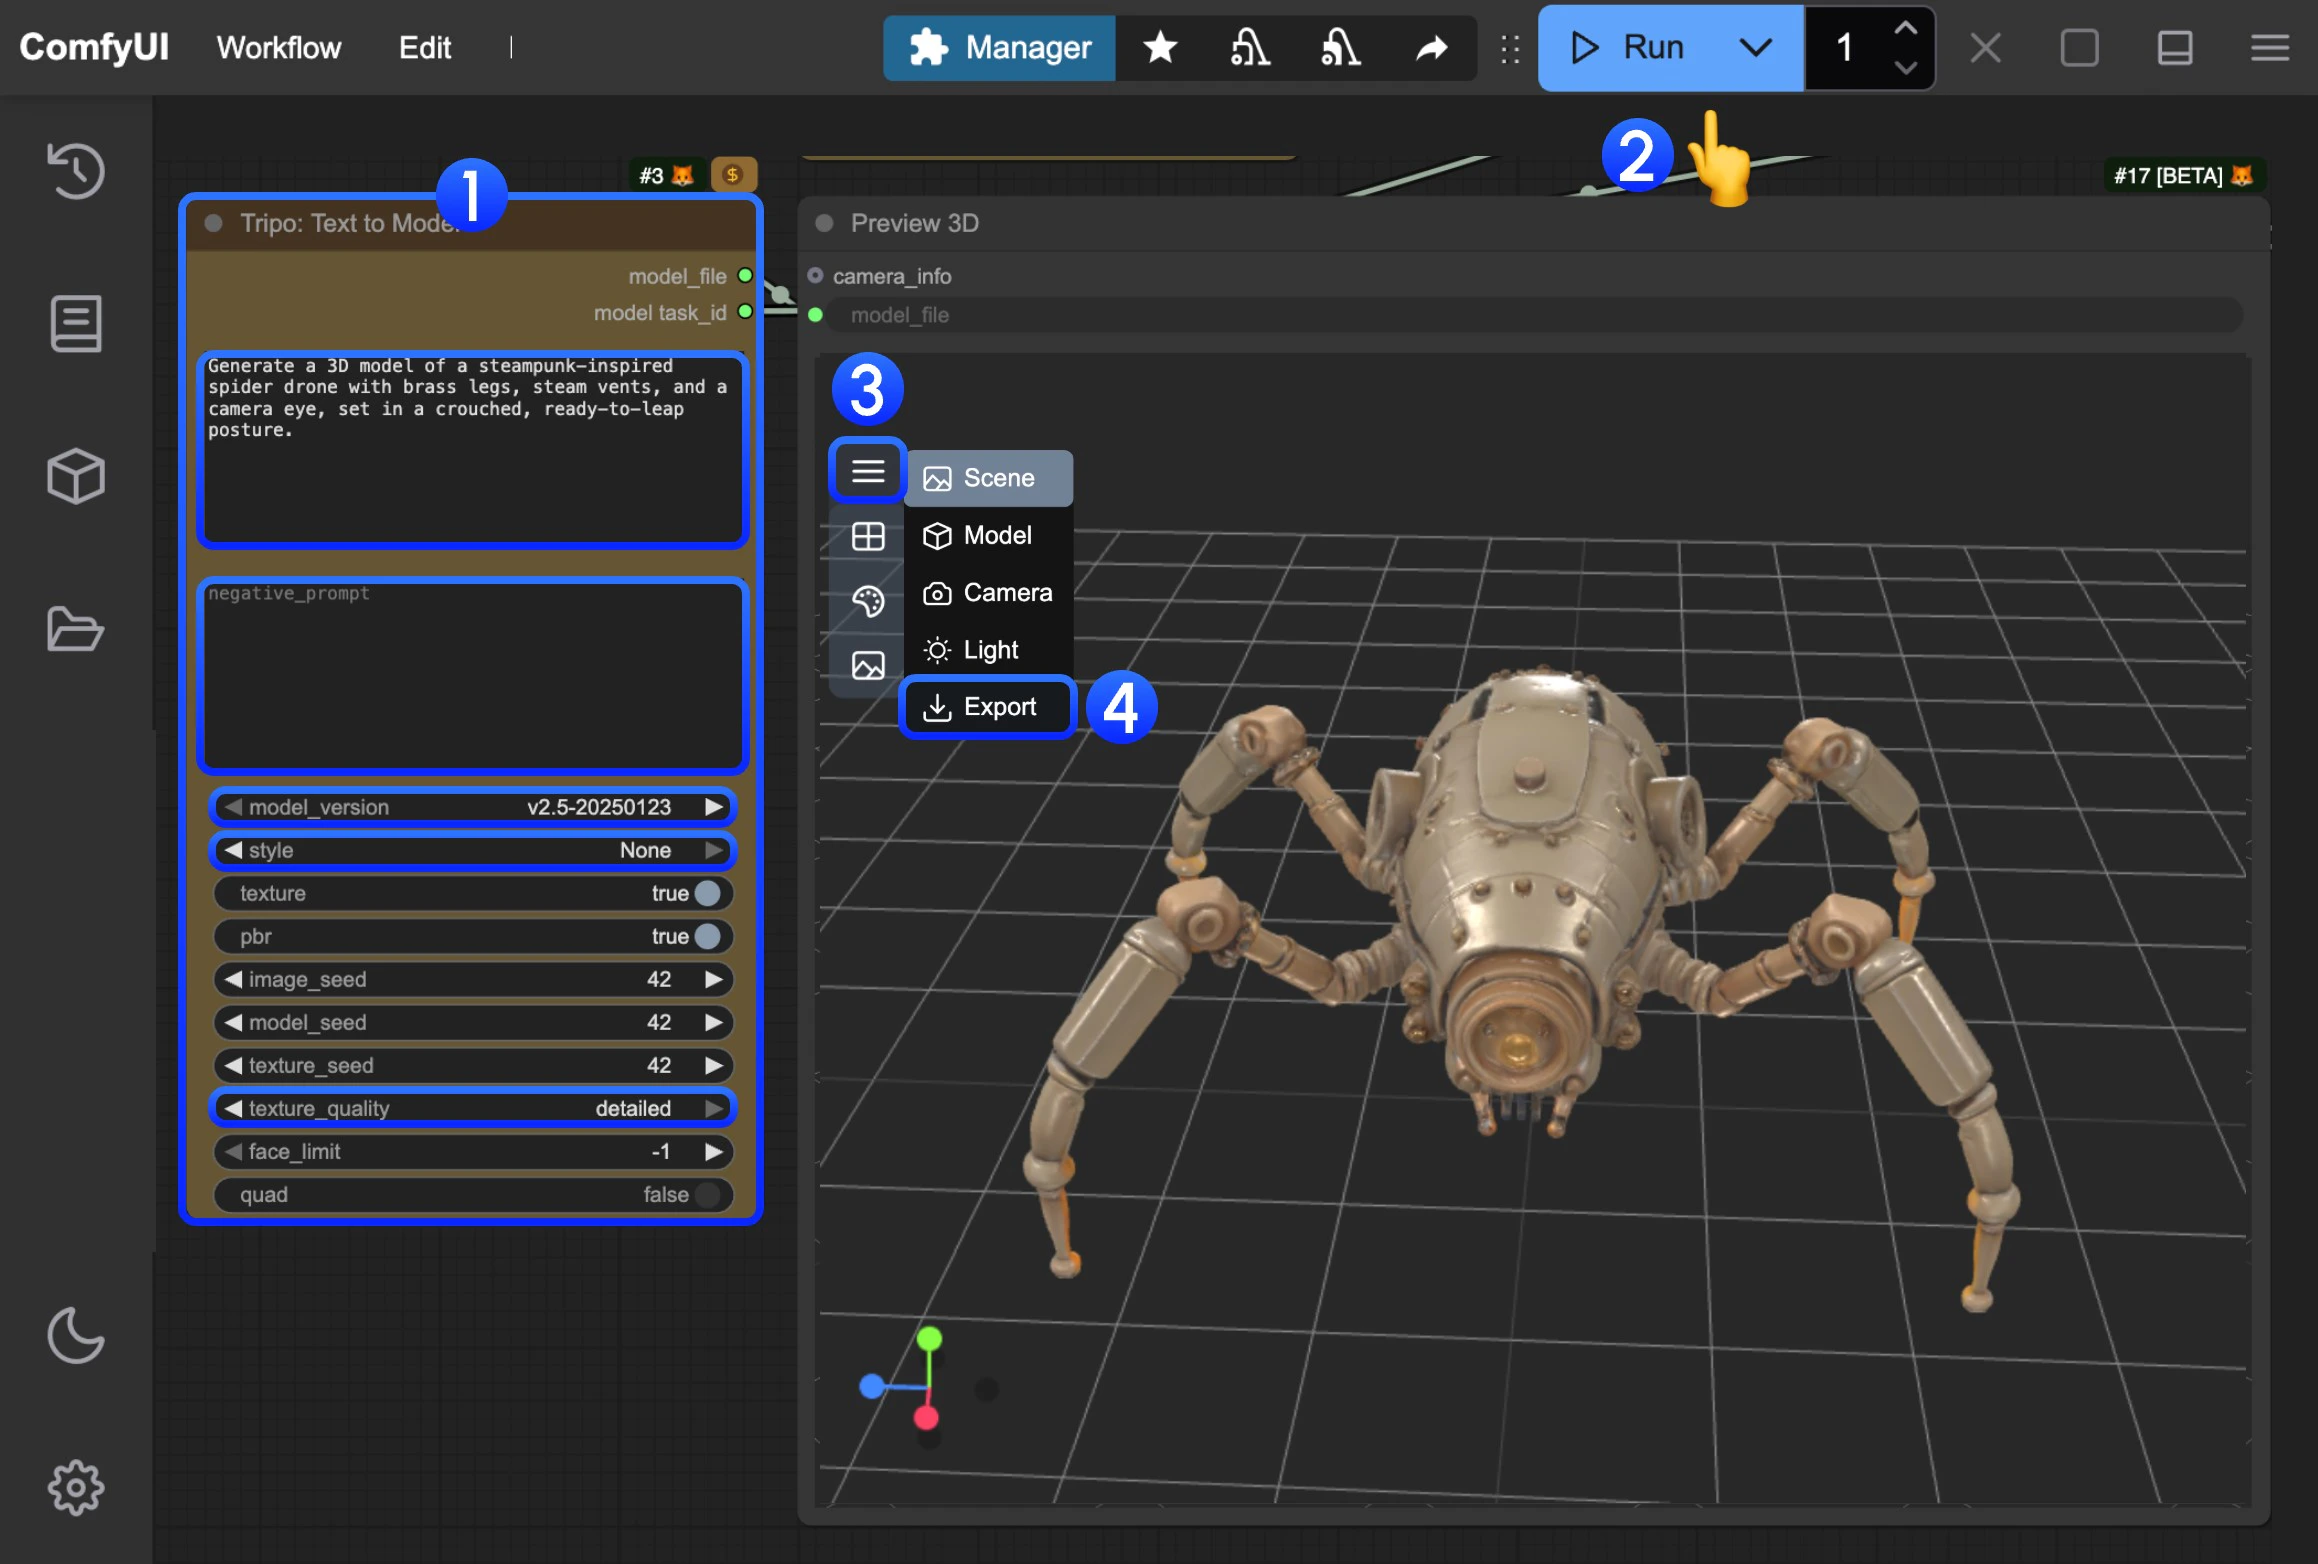
- In the
Tripo: Text to Modelnode, input your prompt in thepromptfield- model: You can select different models, currently only v1.4 model supports subsequent optimization with
Tripo: Refine Draft model - style: You can set different styles
- texture_quality: You can set different texture qualities
- model: You can select different models, currently only v1.4 model supports subsequent optimization with
- Click the
Runbutton, or use the shortcutCtrl(cmd) + Enterto execute model generation. After the workflow completes, the corresponding model will be automatically saved to theComfyUI/output/directory - In the
Preview 3Dnode, click to expand the menu - Select
Exportto directly export the corresponding model
Image-to-Model Workflow
1. Workflow File Download
Download the file below and drag it into ComfyUI to load the corresponding workflow.Download Json Format Workflow File
Download the image below as input image
2. Complete the Workflow Execution Step by Step
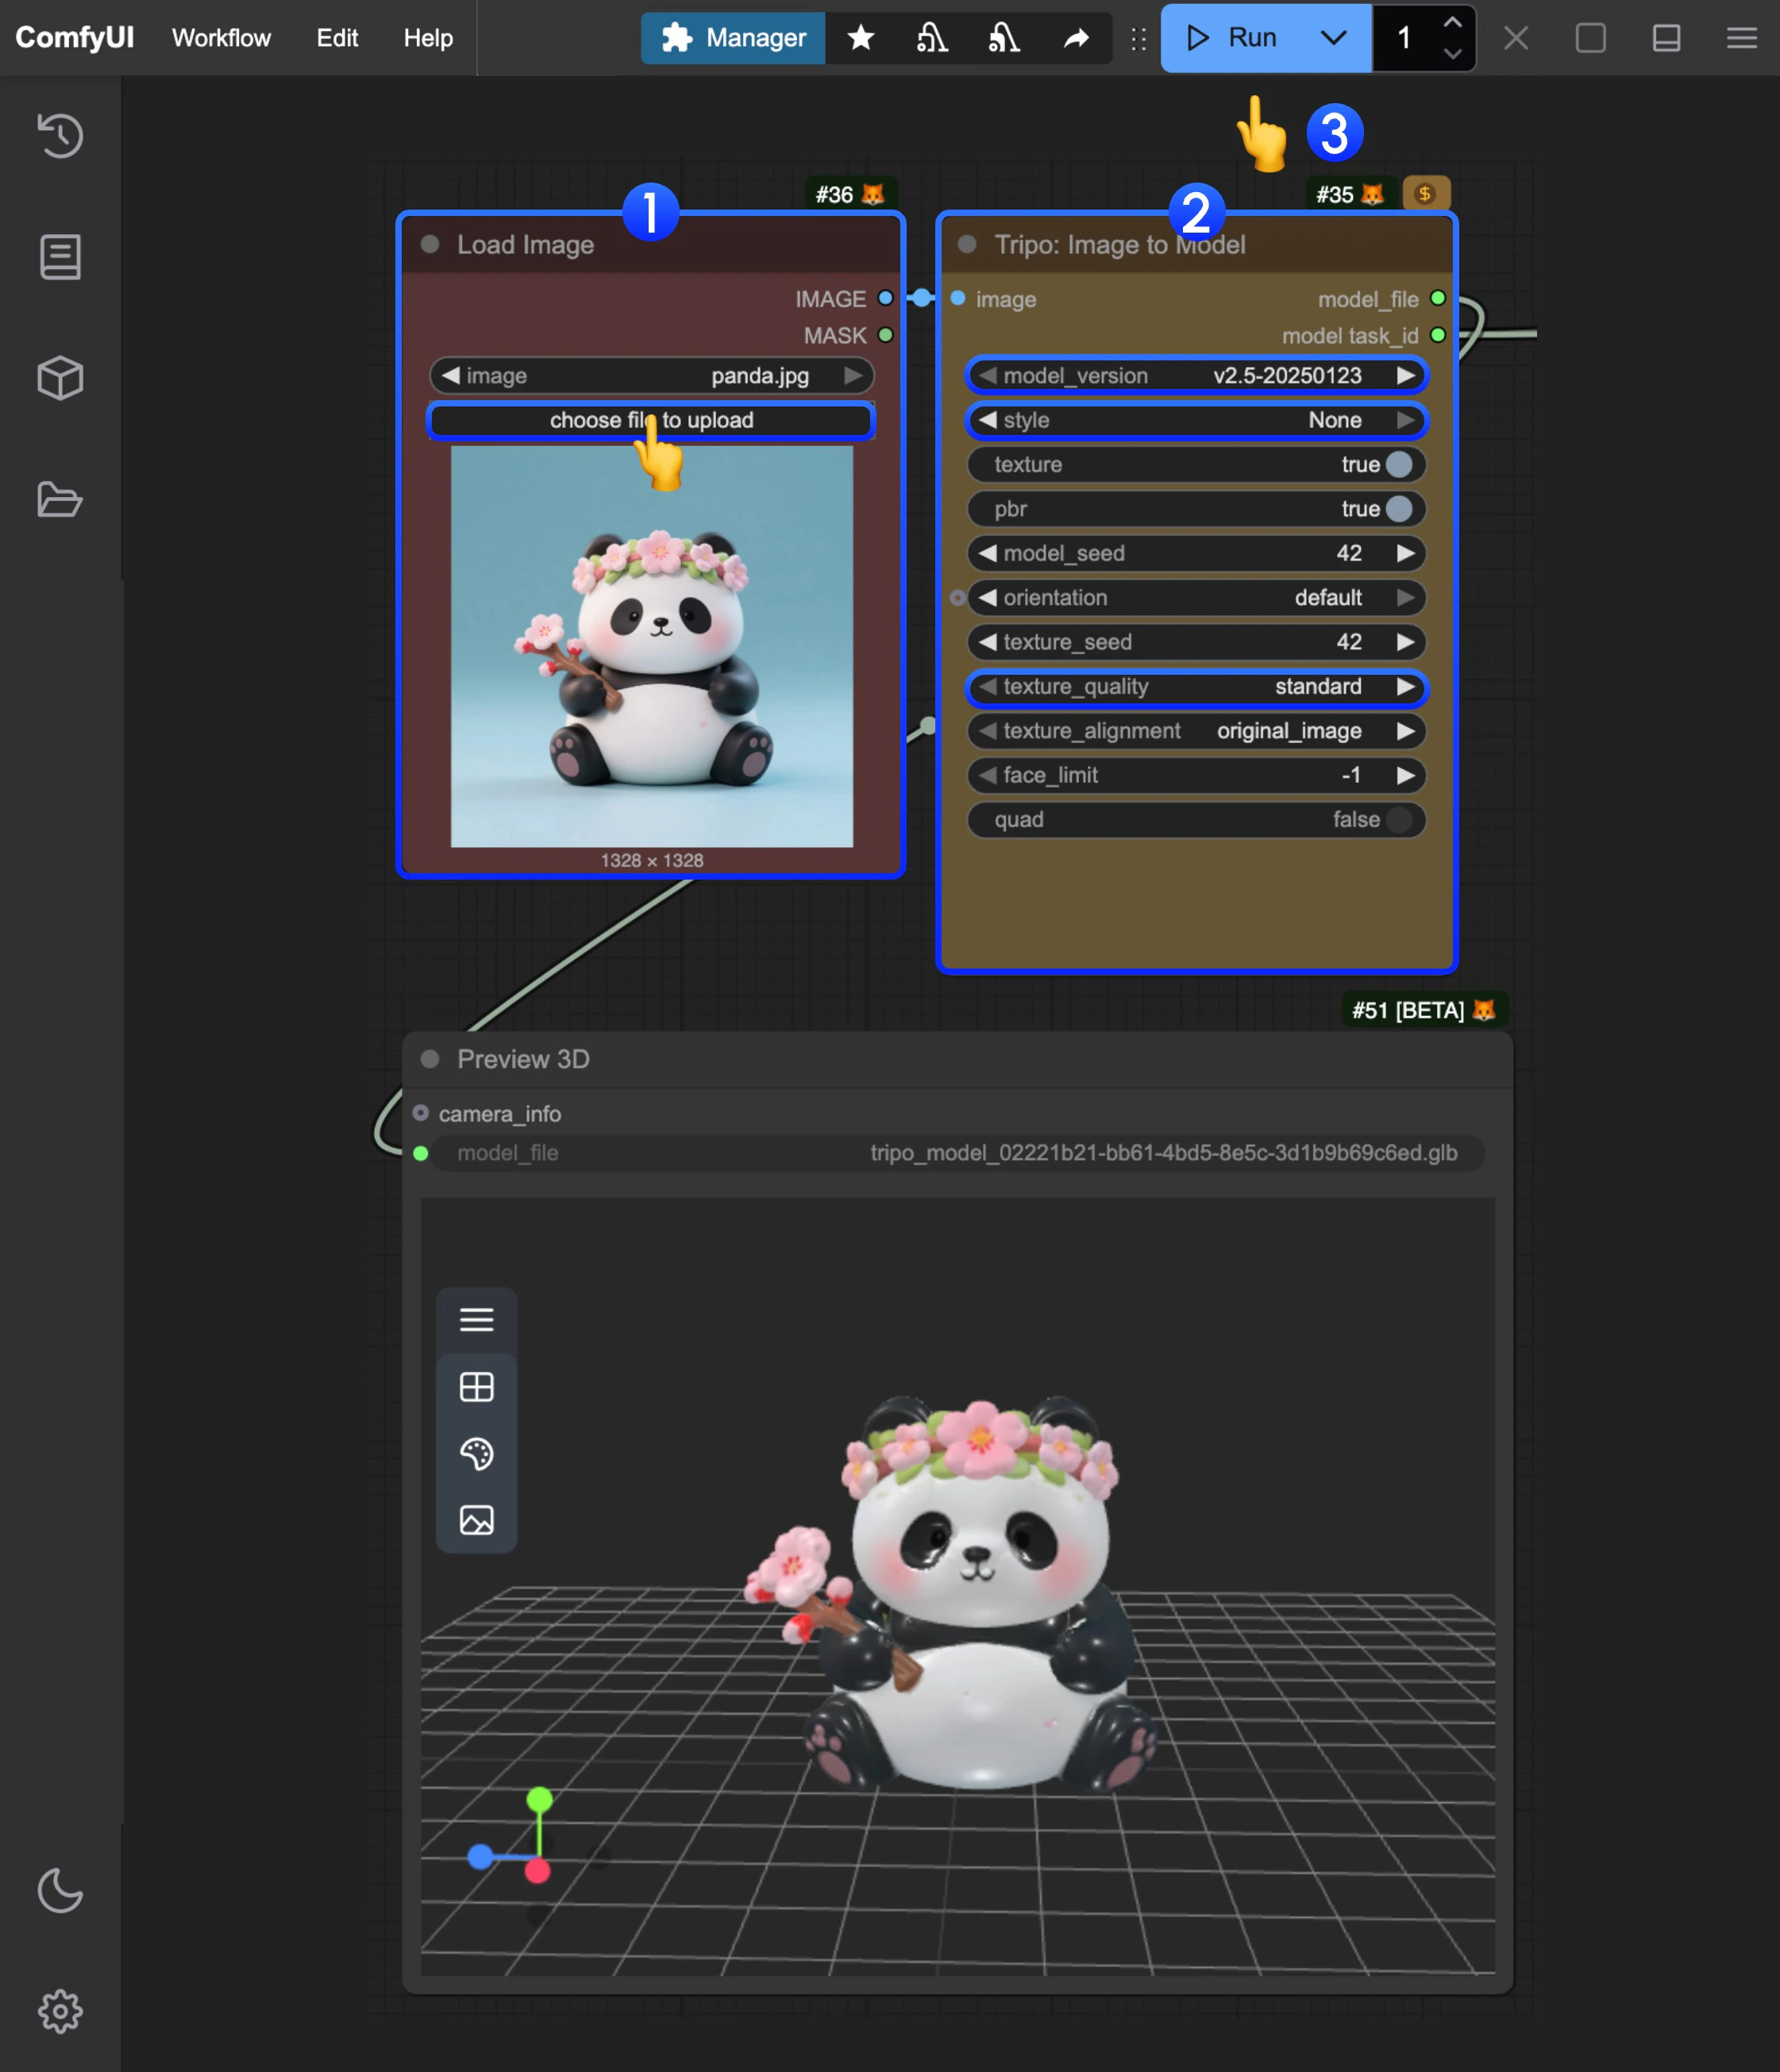
- In the
Load Imagenode, load the provided input image - In the
Tripo: Image to Modelnode, modify the corresponding parameter settings- model: You can select different models, currently only v1.4 model supports subsequent optimization with
Tripo: Refine Draft model - style: You can set different styles
- texture_quality: You can set different texture qualities
- model: You can select different models, currently only v1.4 model supports subsequent optimization with
- Click the
Runbutton, or use the shortcutCtrl(cmd) + Enterto execute model generation. After the workflow completes, the corresponding model will be automatically saved to theComfyUI/output/directory - For model download, please refer to the instructions in the text-to-model section
Multi-view Model Generation Workflow
1. Workflow File Download
Download the file below and drag it into ComfyUI to load the corresponding workflow.Download Json Format Workflow File
Download the images below as input images

2. Complete the Workflow Execution Step by Step
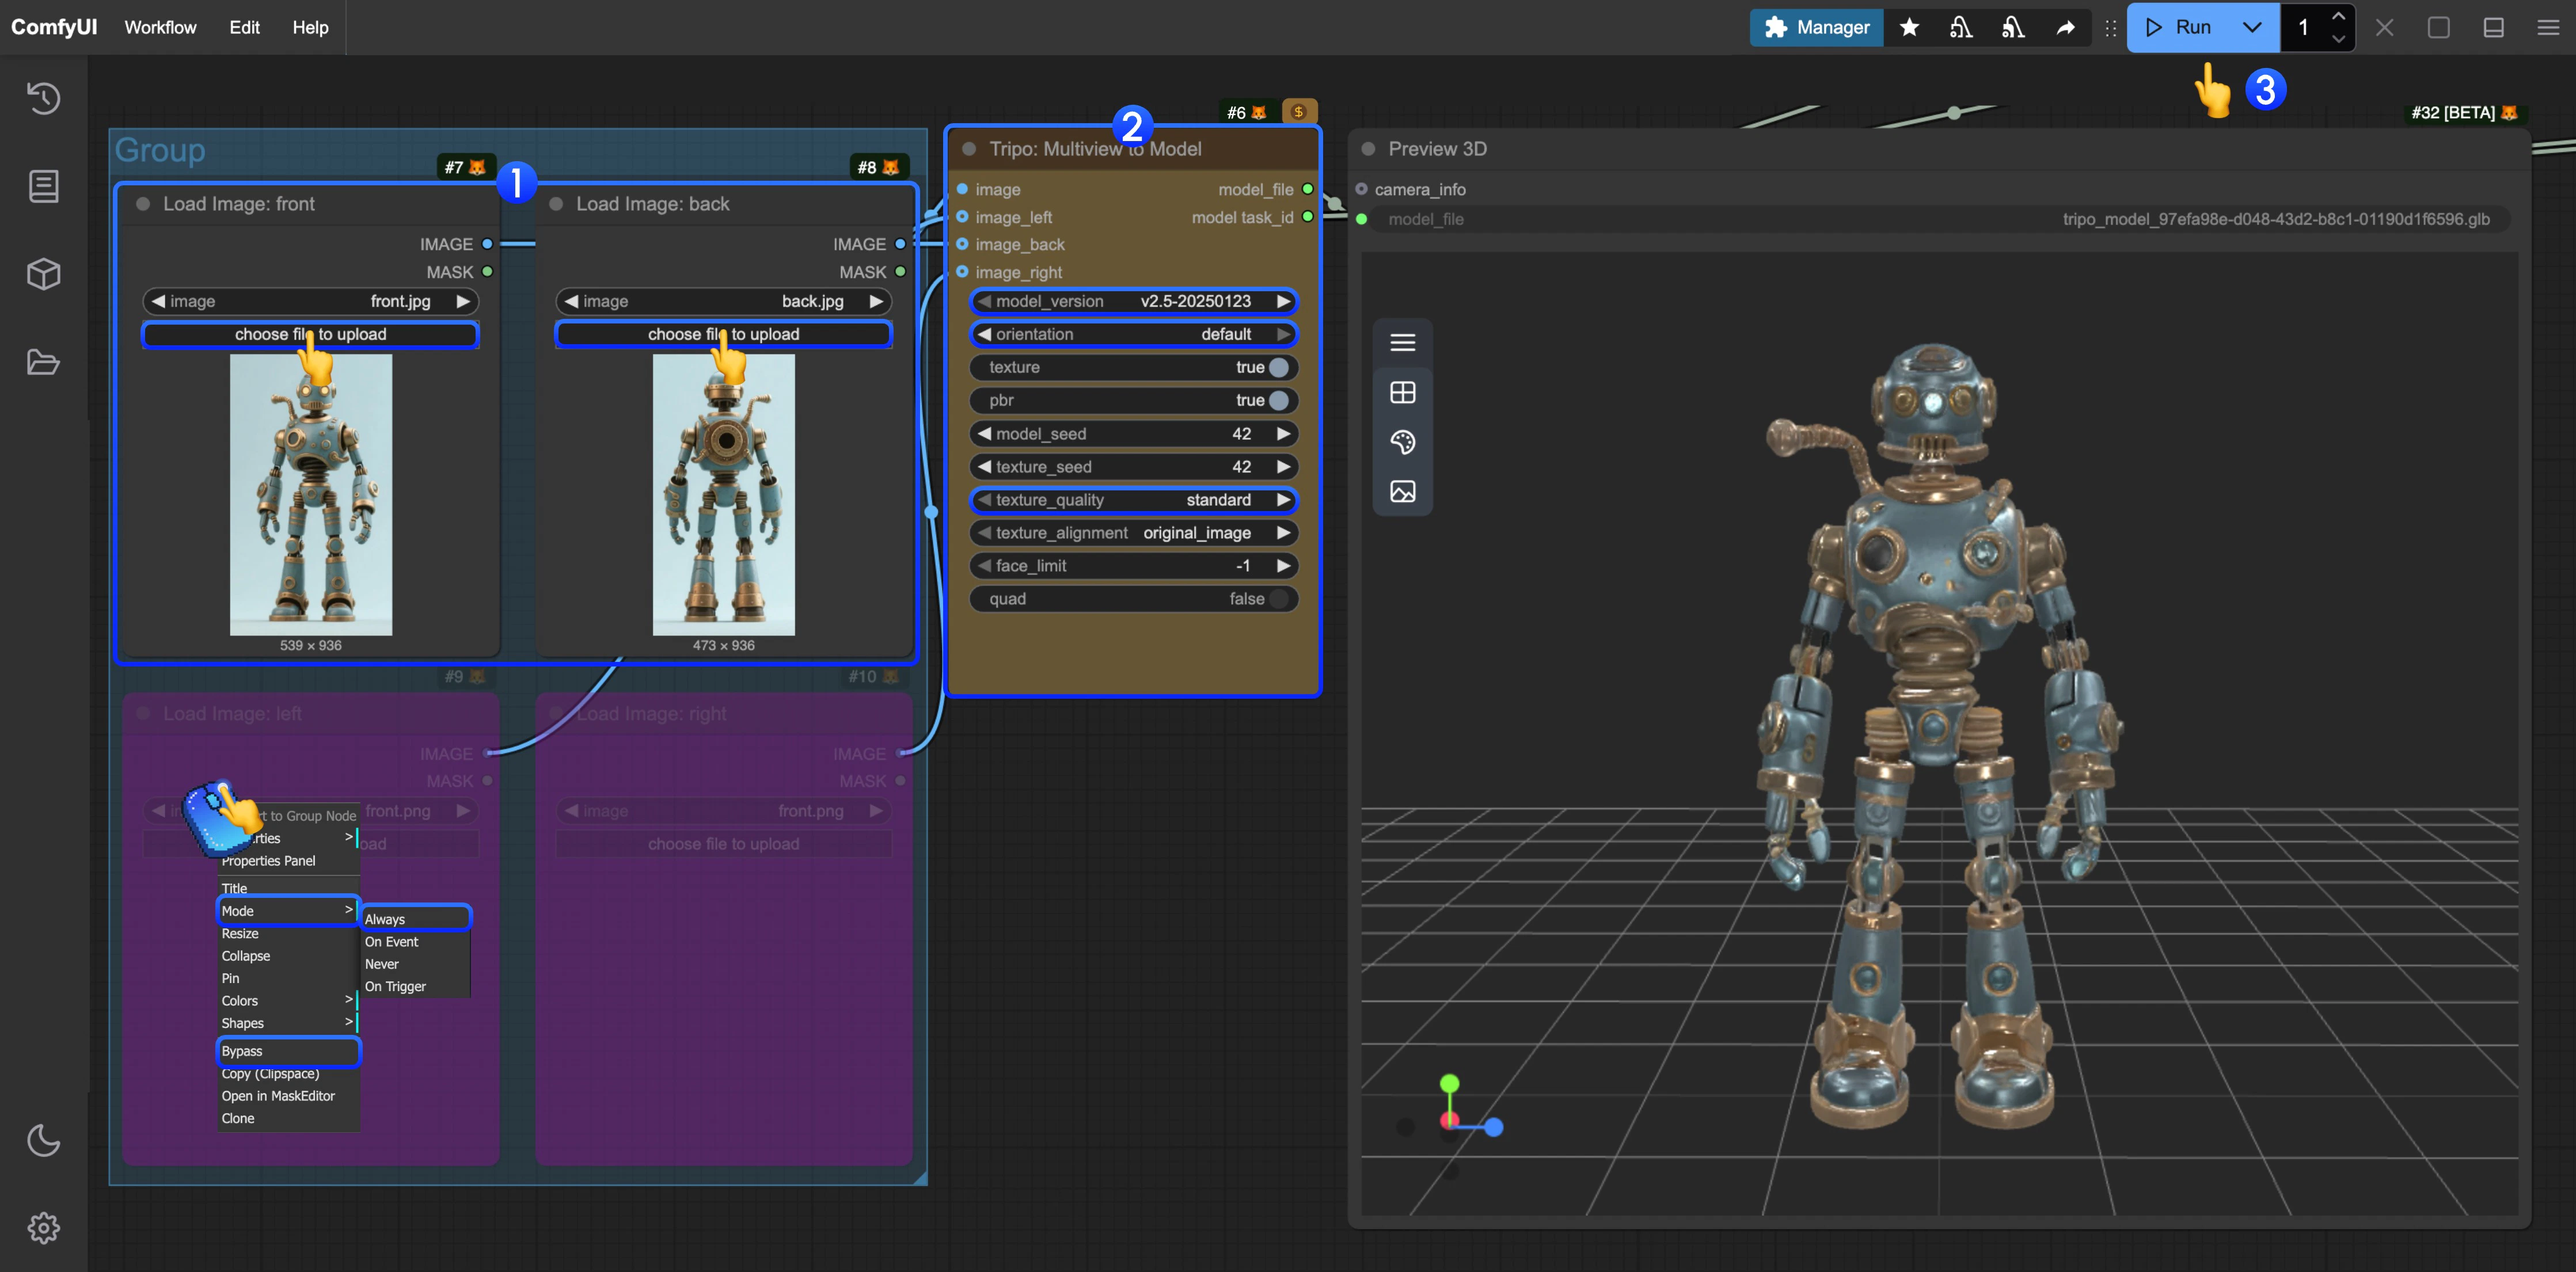
- In the
Load Imagenodes, load the provided input images respectively - In the
Tripo: Image to Modelnode, modify the corresponding parameter settings- model: You can select different models, currently only v1.4 model supports subsequent optimization with
Tripo: Refine Draft model - style: You can set different styles
- texture_quality: You can set different texture qualities
- model: You can select different models, currently only v1.4 model supports subsequent optimization with
- Click the
Runbutton, or use the shortcutCtrl(cmd) + Enterto execute model generation. After the workflow completes, the corresponding model will be automatically saved to theComfyUI/output/directory - For other view inputs, you can refer to the step diagram and set the corresponding node mode to
Alwaysto enable it - For model download, please refer to the instructions in the text-to-model section
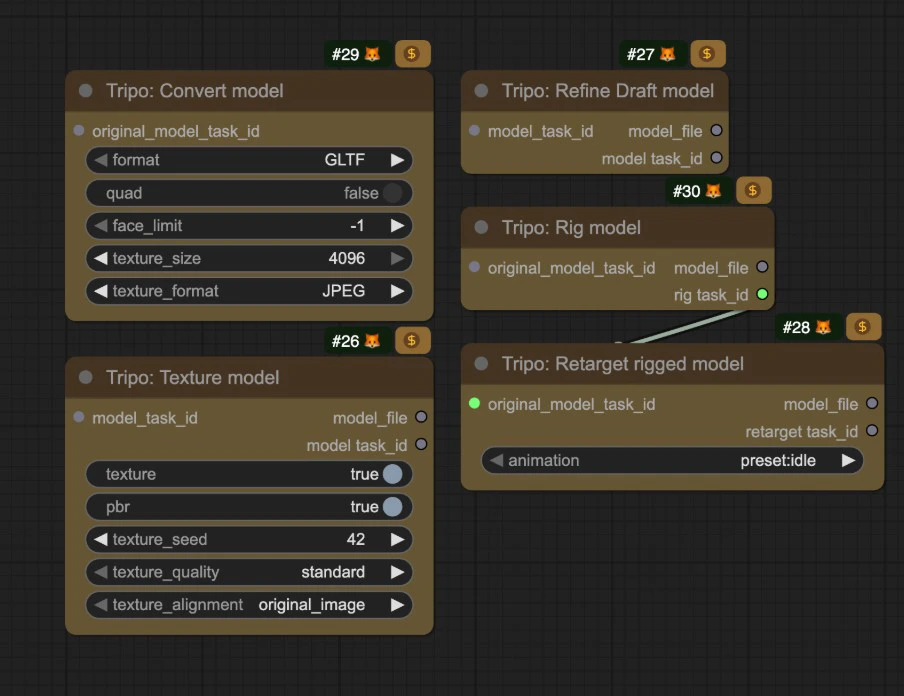
Subsequent Task Processing for the Same Task
Tripo’s corresponding nodes provide subsequent processing for the same task, you only need to input the correspondingmodel_task_id in the relevant nodes, and we have also provided the corresponding nodes in the relevant templates, you can also modify the corresponding node mode as needed to enable it